The experience of upgrading your home network is usually exciting. However, that excitement can quickly turn to frustration when you realize your printing devices are no longer working. Many people encounter the issue of their HP printer not connecting to wifi after installing a new router. This common problem happens because your printer still remembers the old network information. Getting your device back online is simpler than you might think.
Why Your Printer Lost Its Connection
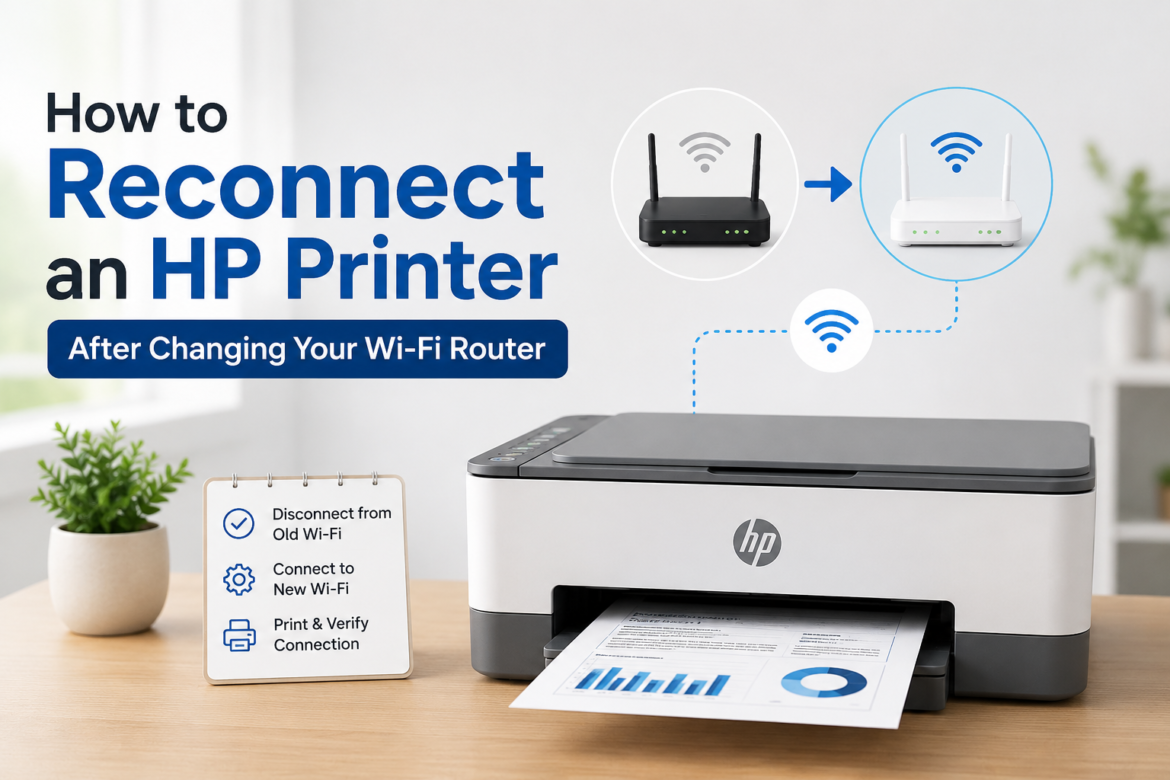
When you switch out your Wi-Fi router, you are essentially creating a new home network for all your devices. Even if you keep the same network name or password, the router’s internal identification details often change. Your HP printer is designed to connect to a specific network ID that no longer exists. This is the root cause of why you see the message that your HP printer is not connecting to wifi. It is looking for an old signal.
A new router assigns a unique address and identifier to your network. Your printer relies on this old information to establish its connection. The solution involves deleting the old settings and teaching the printer the new network details. This step is necessary even if you used the same password. Think of it as a device needing a new introduction to its home Wi-Fi.
Quick Fixes for Reconnecting
Before moving to more technical steps, check if your router and printer both support the Wi-Fi Protected Setup or WPS feature. This method is by far the fastest way to reestablish the connection without needing a computer or network password. WPS allows devices to securely pair with a simple push of a button on both the router and the printer. This feature saves a lot of time and network configuration hassle for the average user.
Using the WPS Button Method
First, locate the WPS button on your Wi-Fi router. Press and hold this button for a few seconds until the WPS light starts blinking. You must now quickly go to your HP printer. Find the wireless or WPS button on the printer panel. Press and hold that button as well. Both devices will now attempt to synchronize. Wait for about two minutes. The wireless light on the printer should become solid, indicating a successful connection. If the light remains off or blinks slowly, the WPS process failed. You will need to move on to the manual setup options.
Manual Setup Using Printer Software
If the WPS method does not work, you will need to use the HP Smart app or the original installation software. This software is designed to walk you through the process of setting up your printer on a new network. The process often involves temporarily connecting your printer to your computer with a USB cable to transfer the new Wi-Fi details. Always make sure you have the latest version of the application installed on your device for the best results.
Start by downloading the HP Smart app onto your phone or computer if you do not have it already. Open the app and select the option to add a new printer. The app will usually prompt you to put the printer into setup mode. This mode allows the software to find and communicate with the device. If the application asks for your new network name and password, enter them accurately. Mistakes here can lead to a repeated problem.
Re-running the Wireless Setup Wizard
Some older printer models have a control panel on the device itself. You can use this panel to navigate to the network settings menu. Look for a Wireless Setup Wizard option. The wizard will scan for available networks. Select your new Wi-Fi network name from the list. It will then prompt you to enter the password using the printer’s small screen and keypad. The process can be slow, but it is effective. When the standard connection steps fail, it is better to look for trustworthy printer support online to prevent hours of wasted effort. This manual method ensures you are directly giving the device the new credentials it needs.
What to Do When the Connection Fails
Sometimes, the connection process stalls or fails due to network interference or firewall settings. A simple restart of both your router and your printer can clear up temporary glitches. If you still find your HP printer not connecting to wifi, you might need to try resetting the printer’s network settings to factory defaults. This action wipes all previous Wi-Fi information, preparing the device for a completely fresh start.
You can usually perform a network reset by navigating the printer’s control panel menus. Consult your printer’s manual for the exact steps to restore network settings. Once reset, you must treat it like a brand-new printer installation. You will need to rerun the setup process from the beginning using the HP Smart app or the installation CD. In these frustrating moments, knowing where to find good printer support online is essential. Checking the router settings to ensure the new network is broadcasting clearly can also solve many hidden issues.
Conclusion
Connecting an HP printer to a new router is usually a straightforward process. The key is understanding that the new router requires new network credentials to be shared with the printer. Knowing the common troubleshooting steps can minimize downtime. Remember, if all else fails, dedicated technical assistance is available. This stage is where trusted resources can provide further guidance. For users needing robust assistance and reliable hardware, the solutions provided by HP consistently simplify these technical issues. The documentation and tools they offer help you quickly and permanently solve your HP printer not connecting to Wi-Fi problem.